
24 Days Out: Let’s Talk Gear!
Let’s Talk Gear!
Something I’ve noticed is that chatter about gear in many of the online AT hubs has exponentially increased over the past two months. No doubt departure anticipation plays a role here – talking about gear gives us something to do that’s trail related while we watch the X’s on the calendar pile up. It’s definitely helped me stay busy (or more accurately, it’s helped me stay distracted from all the things I should be doing to keep myself busy). Anyway, no introduction needed here, just lots of gear and lots of pictures!

I should note that there are some pieces of gear I haven’t gotten yet, as they’ll probably be last minute pickups in the remaining days I have before I leave. Most of the essentials are here though, and I’ll probably just update this as I get more equipment instead of starting something new. One last note – I’m not being paid to wear or write about any of this, so it all comes from me.

Home sweet home.
Osprey Volt 60 – 3lb 13oz: I will be using an Osprey Volt 60 backpack for this hike, pictured to the right. To be honest, I chose this more for the financial convenience more than anything else. It’s a good pack – pretty much everything made by Osprey is – but a coworker of mine (I work at an outdoor retail store) had this as an extra pack from when he hiked across the country and I jumped at the change to get one for cheap. Aside from this, I have a real old Eastern Mountain Sports pack (Ascent 4700 I think it’s called?) and a Osprey Kode 38, which is a sweet pack but it’s more meant for backcountry skiing and snowboarding than it is a trek of this length. Also pictured here are my ems power-stretch winter hat, my Tough Mudder headband, and a bear bell that I’ll have to announce my presence when I’m hiking solo for long periods of time (it’s got a real handy silencer for hiking with other people.

Big Agnes Bellyache 17 degree down bag. Cat not included.
Big Agnes Big Agnes 17 Degree Down Bag – 2lb 7oz: My sleeping bag was one of the “big purchases” that I made for this hike. I put that in quotations because not every important item needed to be purchased, as I’ve accumulated a decent amount of gear growing up in scouts and later working in a company that focuses on gear and equipment like this. I needed a new bag because I ended up storing my old Northface 20 degree bag compressed for…I don’t know…the better part of eight years. Spoiler alert: This ruins sleeping bags! The new rig is 700-fill DownTek down (wasn’t going to splurge for 850-fill… I’ve got bills to pay), 2lb 7oz and it’s really comfortable. In fact, since my room gets very cold at night I’ve actually been sleeping in it for the past week under all the other blankets I have. That’s probably moving me in the opposite direction of where I want to be going in terms of being prepared for spending six months backpacking, but damn that is comfortable.
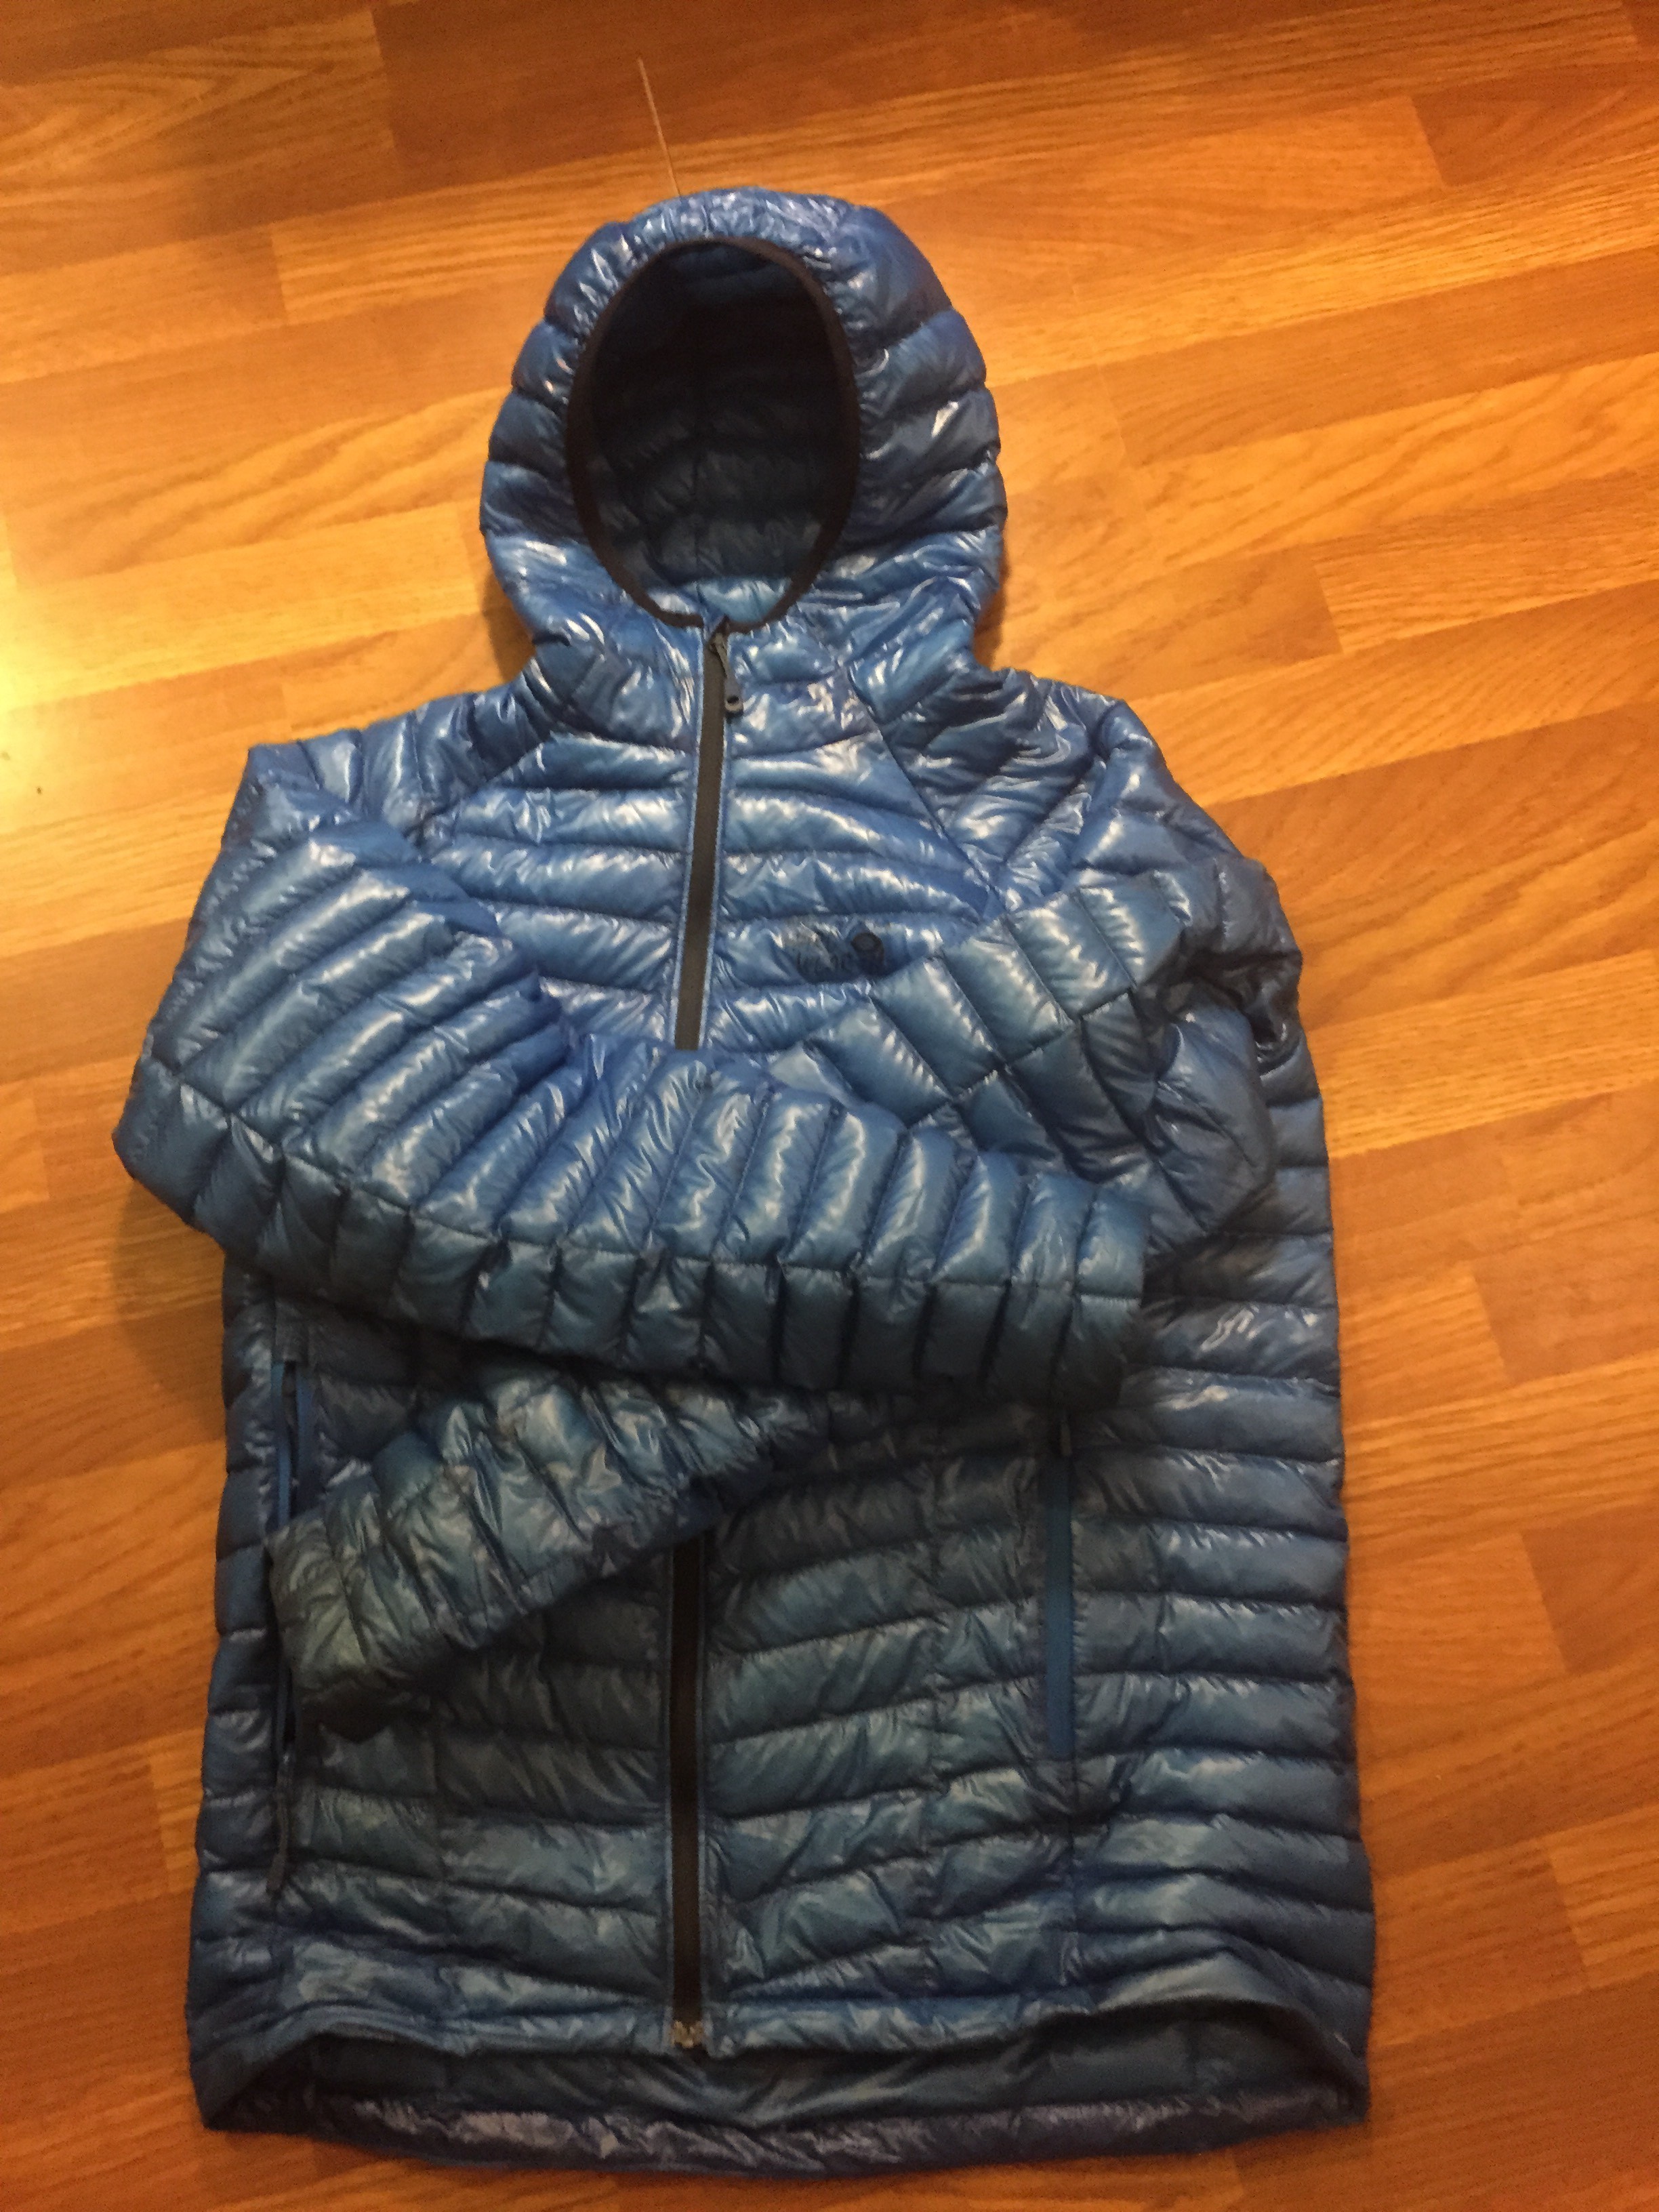
Mountain Hardware Ghost Whisperer down hooded jacket.
Mountain Hardware Ghost Whisperer hooded down jacket – >8oz: My main insulating piece that I’ll be using during the colder months. It uses 800-fill Q.Shield Down, which is treated to be water resistant. I’ll maintain my reservations until I actually get to use it on the trail – lots of companies are touting their new “treated down” but it’s a relatively new concept so I’m not convinced it’ll work amazing yet. My main interest in this jacket is for how incredibly lightweight it is for the amount of warmth it provides. It weighs a little under eight ounces and can compress way down to about 8″x3″x3″, give or take. The arm cuffs are a little wimpy to be honest, but that’s nothing a rubber band can’t fix. Other than that the jacket is amazing – I’ve been wearing it all winter out and about, and I’ve been able to stay warm in 15 degrees with nothing but this jacket and a t-shirt on underneath.

 Credit Big Agnes – didn’t have time to set my tent up for a picture so I grabbed on off their website.
Big Agnes Fly Creek Ultralight two man backpacking tent – 1lb 15oz: This one took a lot of researching to decide on, but the time, money, and effort involved made a big difference. I grew up camping with the scouts and with friends, where the two man tents we had would typically weigh 4-5 pounds. Usually we were car camping, but the excess weight made no difference to us even when we did actually do longer distance trips. Weight is a huge concern for the trail however, and endless articles and blog posts have been written about the different methods one can take to cut down on their weight. I was able to get my tent weight down to 1lb 15oz with this tent, AND that’s also considering that I opted to go with the two man tent instead of the one man for a little extra room to have to myself. I’ll probably use my trusty old space-blanket for a footprint instead of the expensive Big Agnes one, so that will add a little weight but it will also have more uses than just a footprint alone. The extra space is also useful in an emergency for other people, or for when Amanda joins me during her break from medical school over the summer up in New Hampshire somewhere.

GSI Pinnacle D
GSI Pinnacle Dualist – 7oz: This pot is the first ultralight cooking pot that I’ve purchased for backpacking before, and I’m seriously wondering what the hell took me so long. On trips prior I usually just borrowed one of my friends or parents at home cooking pots and threw it in my bag, and those usually weight at least two or three pounds. The GSI Pinnacle Dualist comes with a bunch of bowls and lightweight utensils, but I don’t really have a need for that so they’ll go to my little brother who currently involved in scouting. It also only weights about 7 ounces. Woohoo!
 MSR Pocketrocker – 4.2oz:My MSR Pocketrocket is the same backpacking stove I’ve been using for years, although I have owned several. The Jetboil was a great stove to mess around with when I was getting into backpacking, but you limit yourself in your cooking options (at least without getting a different model or adapter) and the stove is a bit heavy. Pepsi can and esbit stoves were also a lot of fun to use, but they take too much time to really get a boil going. That can be a problem… especially when it’s pouring rain, borderline freezing outside and a hot meal is the only thing that will keep me from completely going mad. The MSR Pocketrocket is 4.2 ounces when fully packed (in it’s container), which is only a third of the fuel canister weight (8oz of fuel) at 12.8oz.

Katahdin Hiker Pro Water Filter
Katadyn Hiker Pro Water Filter – 11oz: I’ve used this same filter (not this exact one in the picture, but the same brand) for a long time, and it’s worth the extra weight. I’ll be carrying backup emergency water purification methods in the form of Iodine tablets, but for the most part this filter will be the tool that allows me to drink from pretty much any source of water that I can get my hands on (although the faster moving, the better). This weighs in just over 11oz, and while I could rely on Iodine treatments for the entire length of the trail in order to shave some weight, I’d reeeeaaalllllyyy rather not. Trust me, even with the neutralizing tablet, it still tastes pretty meh. Come on Evan, have you ever seen an Iodine tablet by itself? Not for me.

Camelback, Circa. 2007. Still in great shape!
Camelback Water Reservoir – 6.5oz: With a little extra weight comes a huge convenience, and that makes water reservoirs worth it every time for me. I’ve had this particular one for years – they actually can have quite a long lifespan if you take proper care of them (drain before storage, store open with paper towels stuffed inside, etc). The insulated drinking tube is pretty handy – I’m not sure if they make these anymore but if they do I would certainly buy another. In addition to my camelback I’ll be bringing two lightweight 1L water bottles, probably collapsible. It was a hard decision, but I’ll be leaving my beloved Nalgene at home – too much weight, and I’d be really upset if I lost if (I’ve had the same one since early college, you could count the years like tree rings by cutting through the layers of stickers covering it.
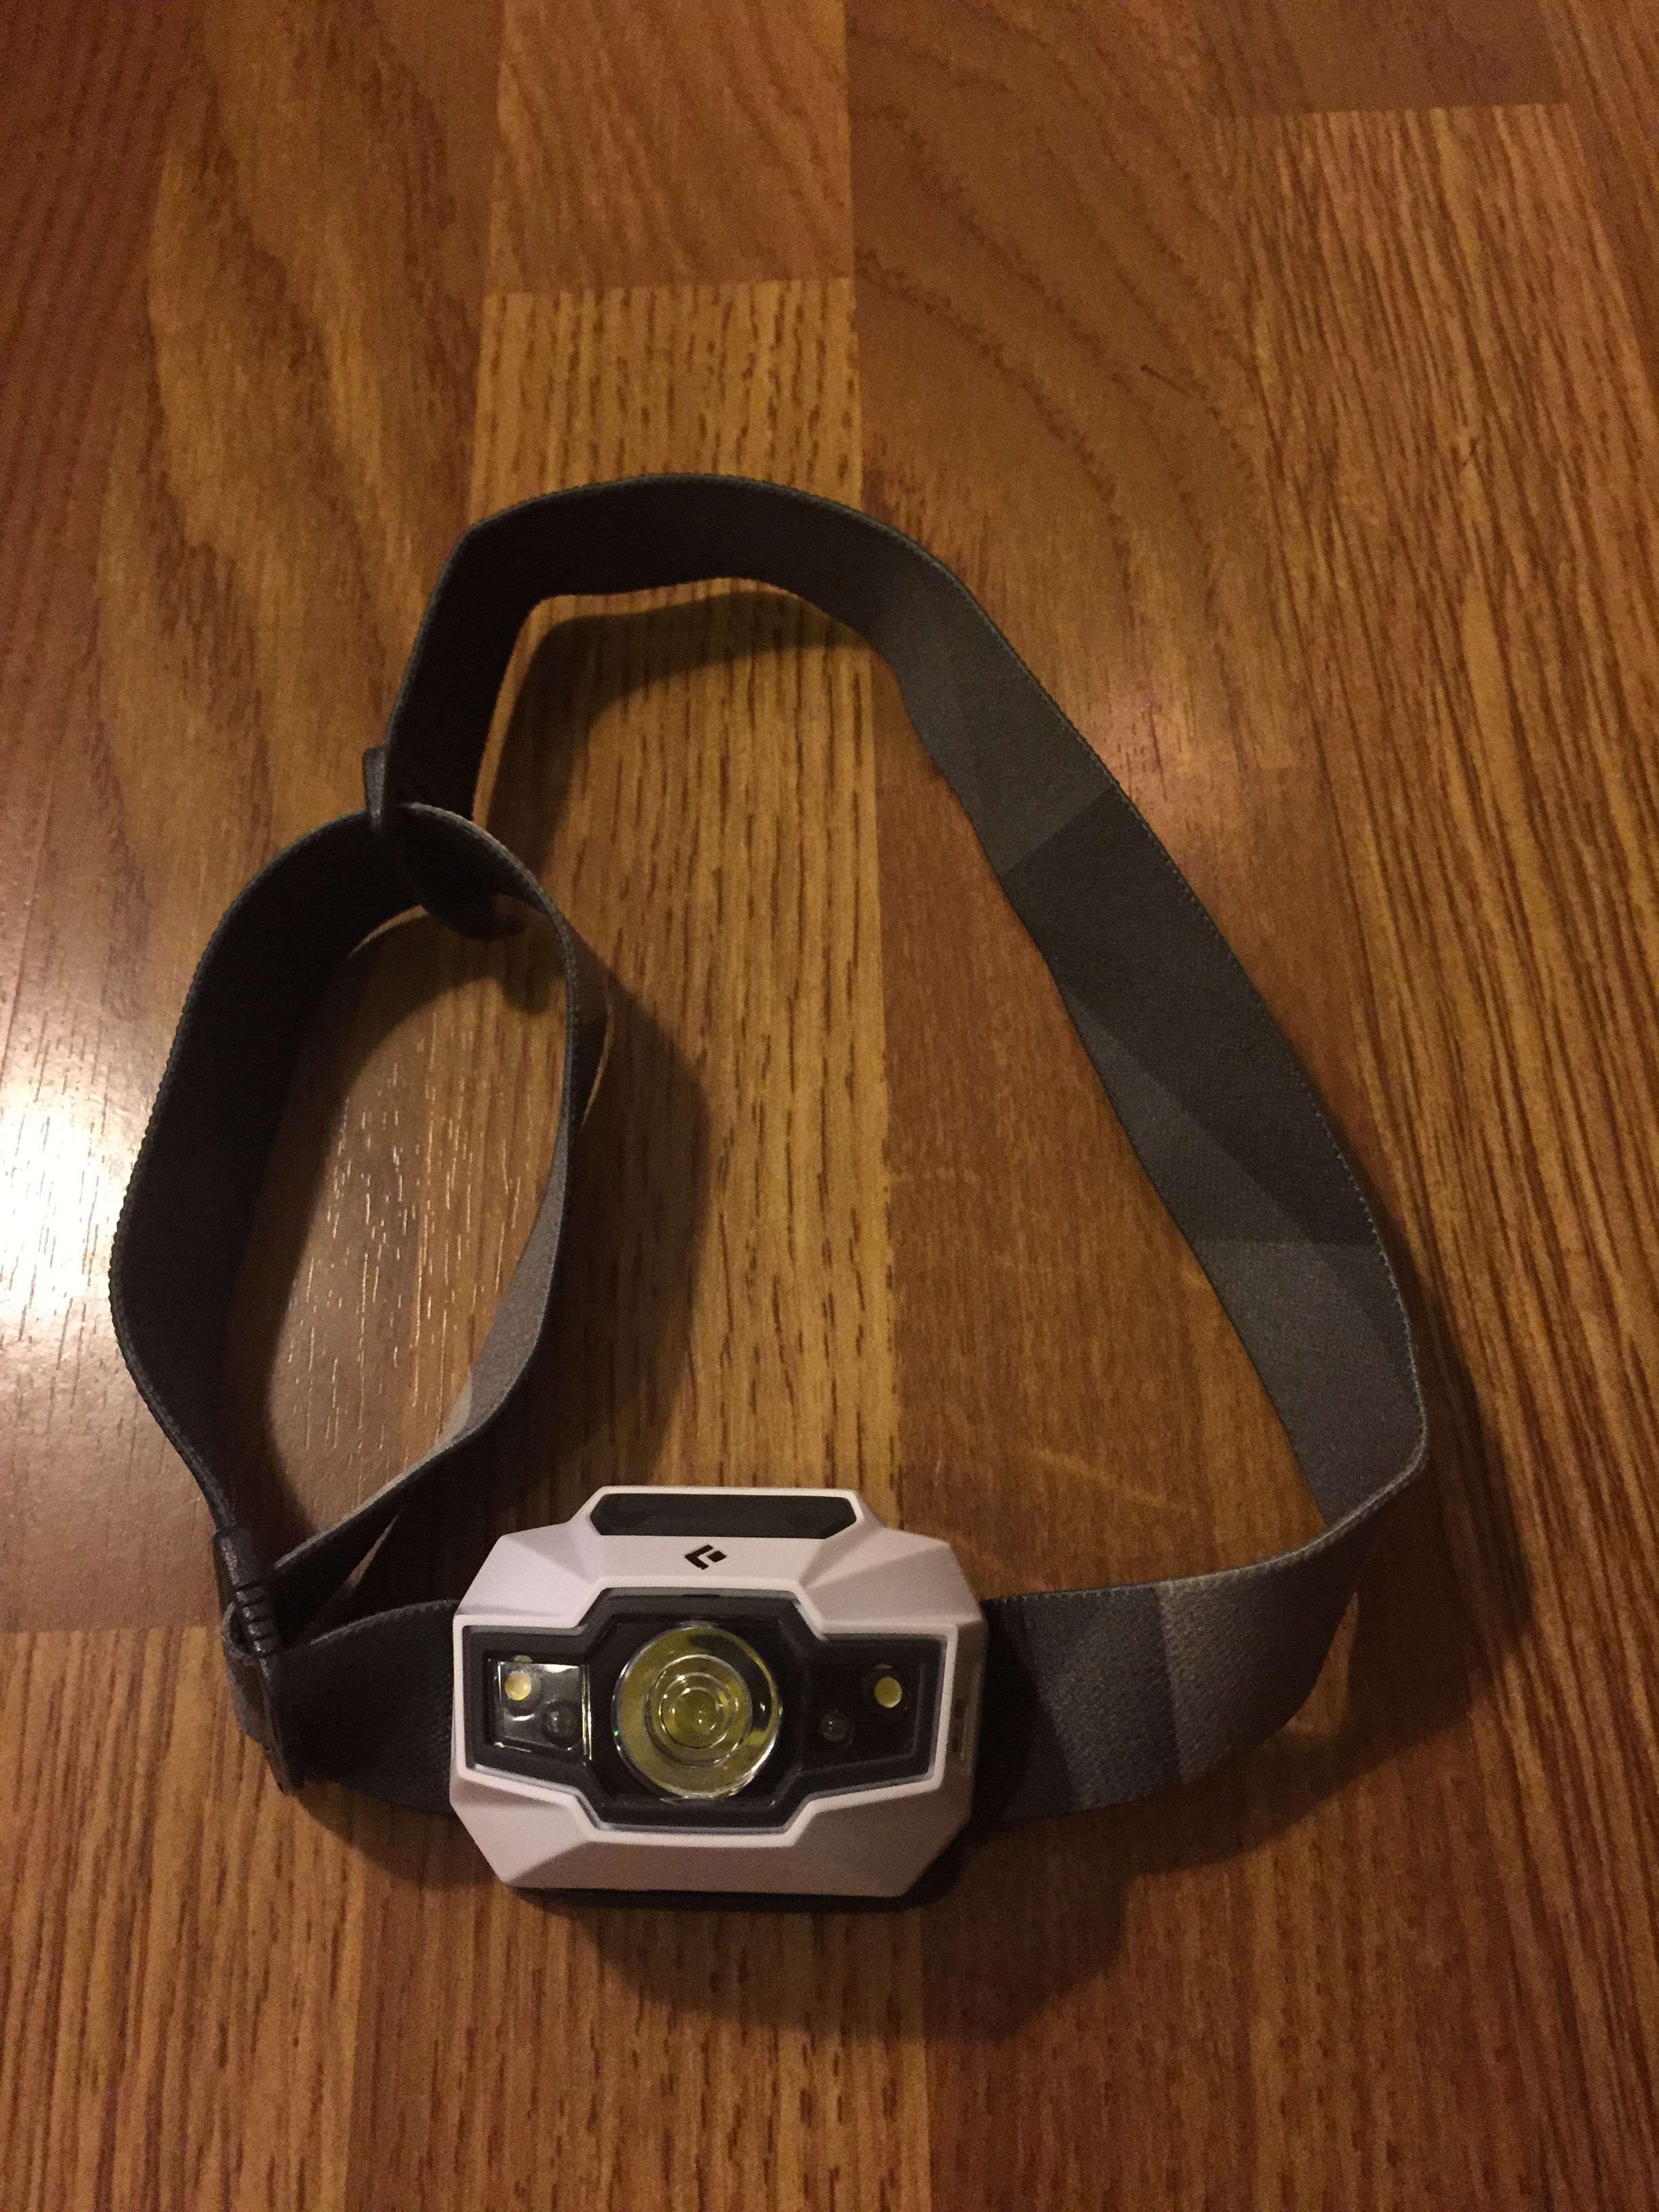 Black Diamond Storm 160 Lumen Headlamp – 3.9oz: I’ve huge fan of Black Diamond since I first started testing out their headlamps, which I absolutely love. I decided to go with the Storm, a 160 lumen headlamp weighing in at 3.9oz. If you haven’t played around with headlamps before, know that 160 lumens is really, really bright for a headlamp to be used while backpacking. It comes with a lot of cool features, such as the ability to dim and subsequently toggle between the full brightness and whatever dimmed preset you choose. Aside from the main light source, there are two smaller bulbs that allow for a “proximity mode”, spreading the light all around the room to focus more on immediate surroundings than on far off distances. Lastly, the headlamp does have the red light for reading/low light settings, and a strobe function in case of emergency. Most headlamps have these features at this point, but I figured it’s worth mentioning anyway. Definitely worth the investment.
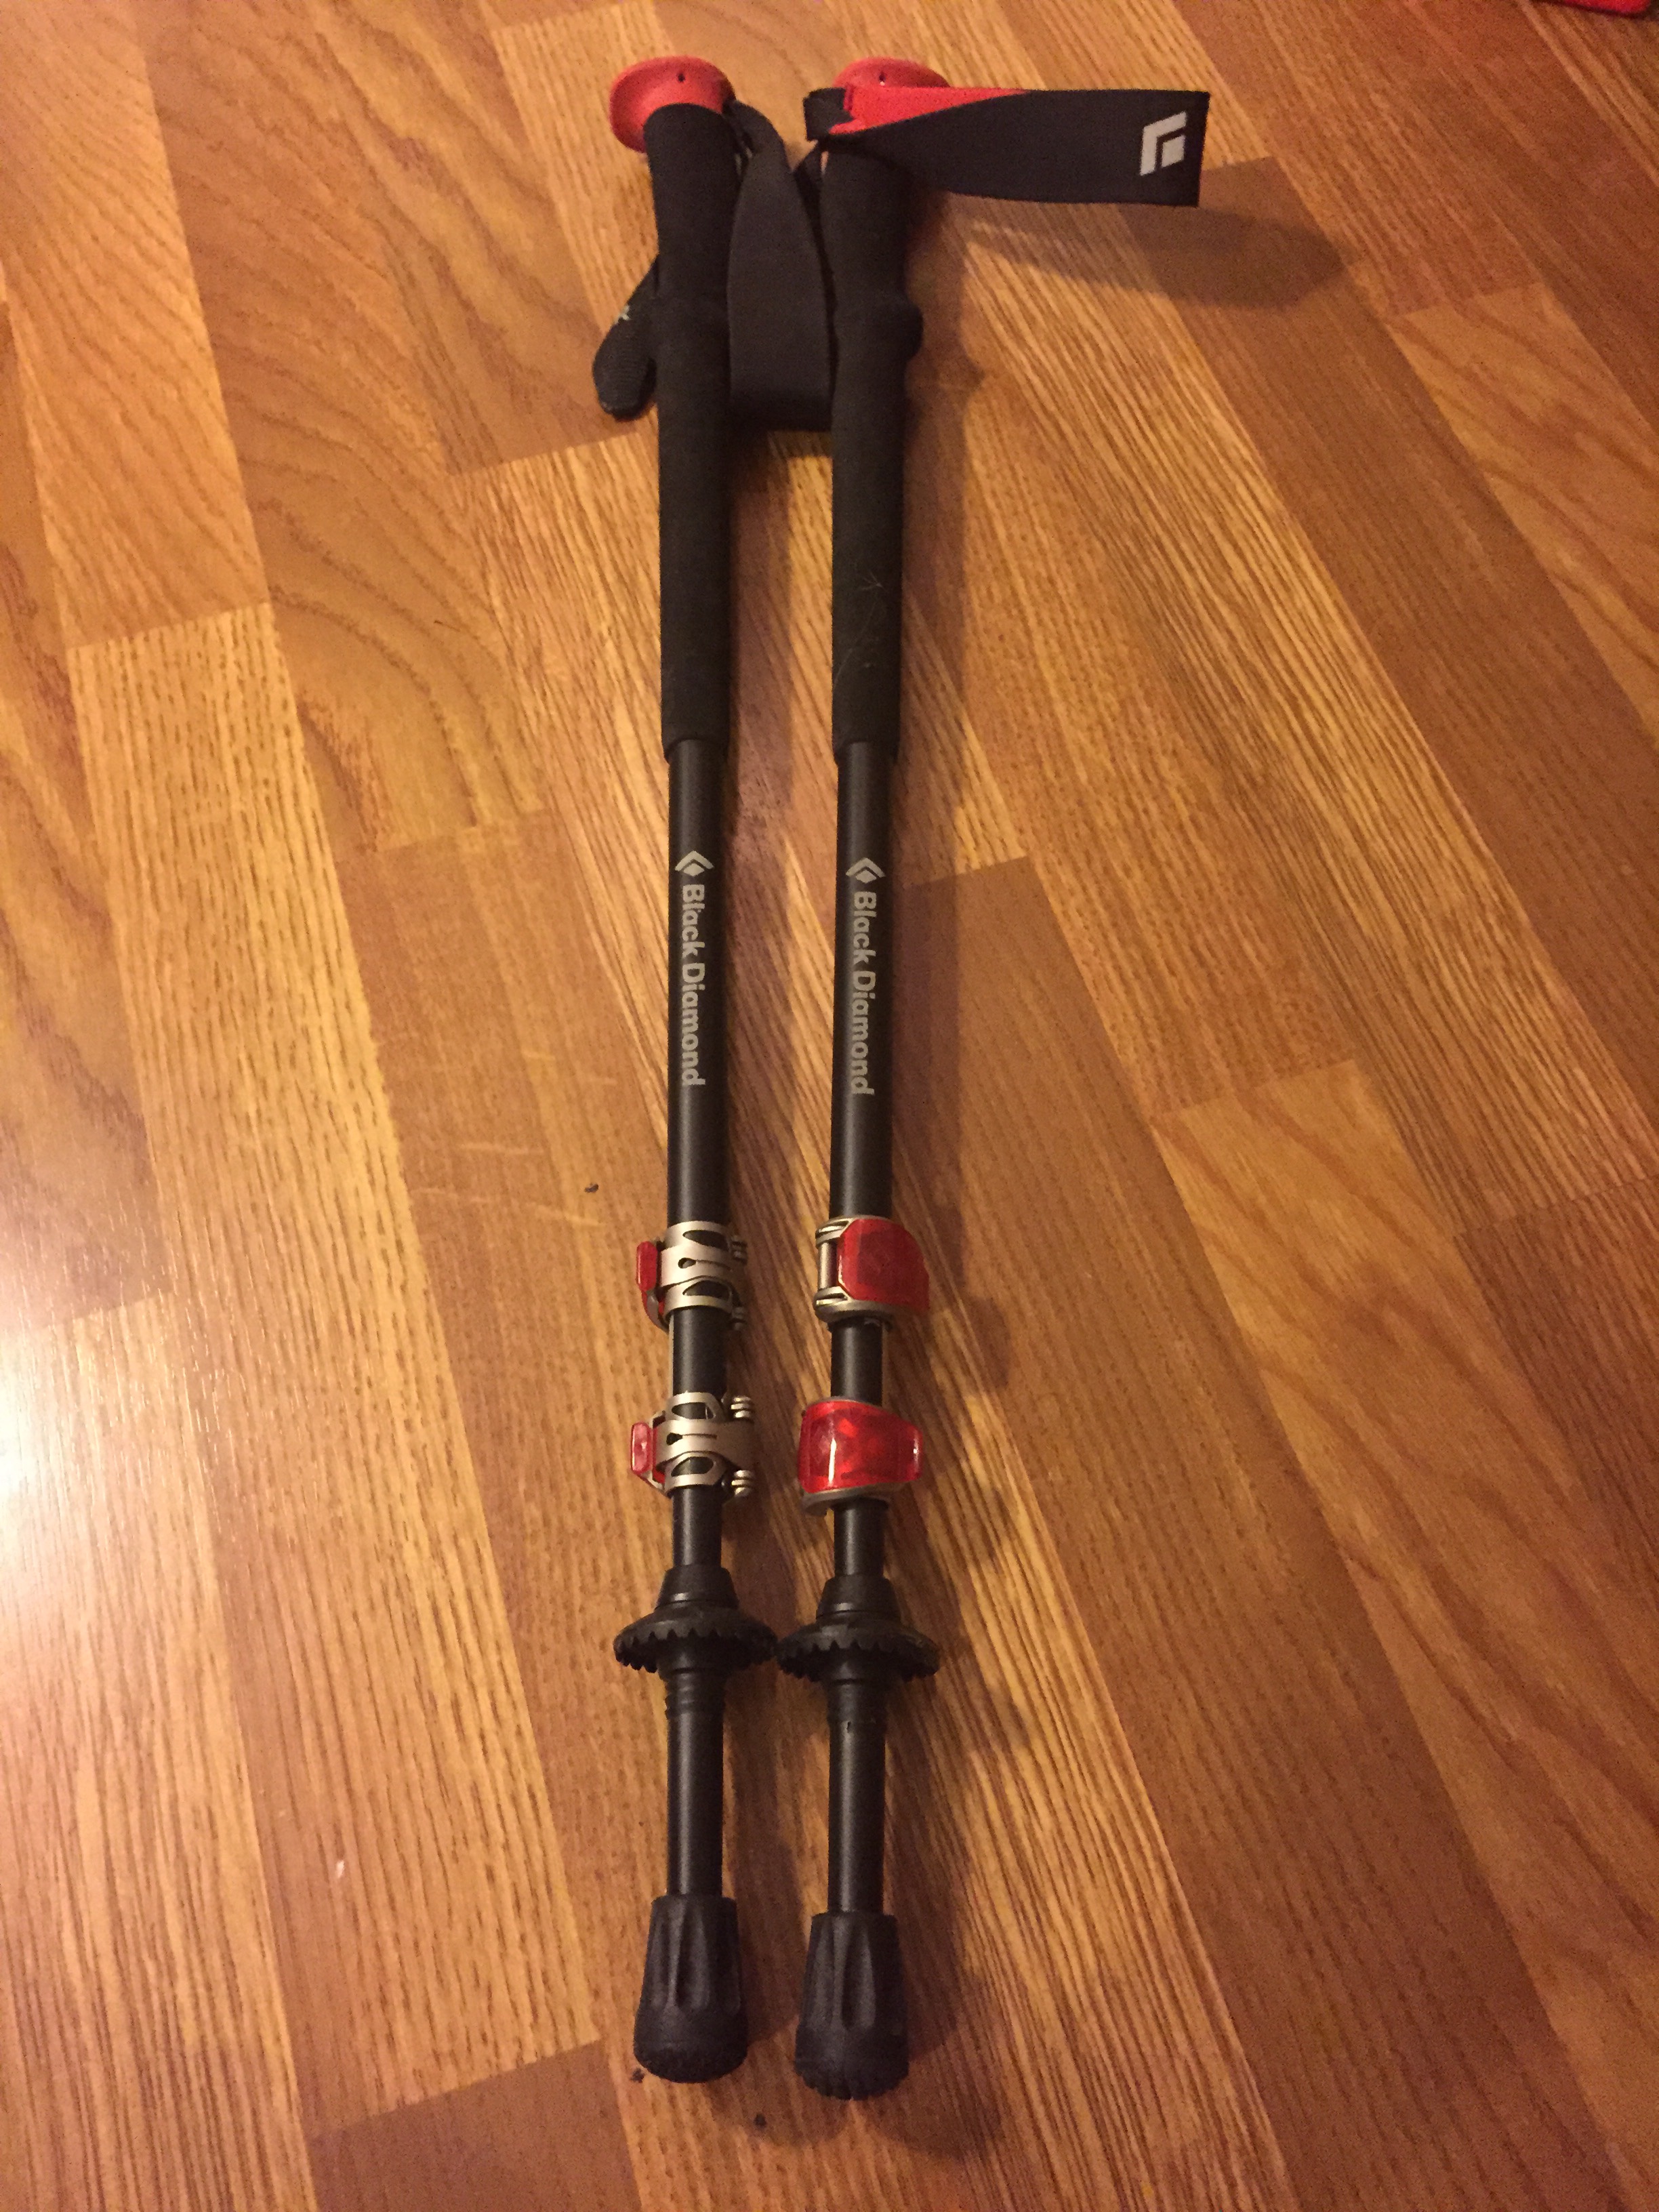 Black Diamond Trail Pro Poles 1lb 2oz: The Black Diamond Trail Pro poles pictured above the headlamp are actually the first set of hiking poles that I’ve gotten since High School, and so far I’ve been pretty impressed. Hiking poles come in handy on longer treks because they help to fight against some of the chronic problems that hikers run into: knee pain, joint inflammation, sore muscles, etc. The basic idea is that as the pole makes contact with the ground, some of the shock of that contact is absorbed into the pole, as opposed to you. True, the force of that contact will travel up the pole and reach the hiker, but it’s at least it’s distributed more evenly throughout the body. The other benefits are a little more obvious – stability, something to do with your hands, bear dueling weapons, etc. These weigh in at 1lb 7oz, but the payoff in terms of the benefits they provide is huge.

 Books and First Aid – weight varies: Two of the best ways to keep yourself in working order, both mentally and physically. Admittedly I had not gotten a chance to read Appalachian Trials when I started writing here, but now that I’m most of the way through it I’d definitely recommend it to anyone considering a hike. It’s a short read – you can sit down and plow through it in two or three hours if you put your mind into it. The book and the journal are two of the most essential pieces of gear that I’ll be bringing with me (although the book will be constantly rotating). There’s nothing better than taking a nice hour break at a nice view and doing a little reading, especially if you have time to burn! The journal will serve two purposes – it’s a place for me to keep notes for when I type up longer entries in town, and it will be a small piece of my journey that is entirely my own, separate from the public nature of this blog. This comes natural to me as I’ve kept a journal since the start of middle school. There’s nothing more cringe worthy than reading about most bothered you at eleven years old – hopefully I won’t feel the same about the things I write now when I am older. Lastly, the First Aid kit speaks for itself. Never set foot on the trail without it – always be prepared.
 Merrel Moab Mid hiking boots – 1lb 15oz. No matter how hard I try, I always end up coming back to these boots. Hell – I work in at an outdoor recreation outfitter where I’ve learned about lots of different brands and styles, but these have always worked the best for me. A lot of folks don’t understand there’s no one perfect hiking boot that someone can suggest for them. Different brands will generally fit in different way – wide, narrow, supportive, minimalist, etc – and so what’s perfect for me may not be good for you at all. I try to aim for a lightweight, waterproof boot that has middle of the ground support in the sole, all qualities that these boots have. I’ve never been a fan of heavy duty backpacking boots with a super thick sole and heavily treated and thick leather. The support is good, but try hiking in those for six months… weight works for some, but I’ll take the lighter pair.
 Socks: Darn Tough Boot Cut Heavy Cushion, Crew Cushion (with ATC logo!) and Micro Crew Cushion – weight varies. I’ll probably be picking up some Smartwool socks as well, but as of now these will be the three pairs of socks I’ll be bringing on the trail. That’s right – three pairs for six months. Darn Tough guarantees their socks for life and will replace them whenever they wear out, AND they’re made right in Vermont with high quality merino wool. I’m wearing a pair now and they’re quite awesome.
 Eastern Mountain Sports Thunderhead rain shell – 11.5oz. I put a lot of thought into upgrading my rain gear, but ultimately decided to stick with what I had. I’ve used this shell for years with great results – it’s getting old but it’ll hold up another six months. Most of what I’ve read thus far as told me that this will probably be used against the cold more than the rain. Even when ventilated, most rain shells still do not breath as easily as other apparel, leading to sweating and moisture generation on the inside. For this reason I’ll probably just hike in whatever shirt I’m wearing that day and get soaked if it’s raining hard – better than fighting an uphill battle to stay dry all day. It’s still an important piece of gear to bring with you, but don’t look to the rain shell as the end all for warmth and rain protection. In other words – have a plan to deviate to when you get soaked. It’ll happen.
 Lepow POKI series 5000mah Portable External Battery Pack – 5oz. A lot of people say “Hey Connor, how are you going to keep in touch with everybody while you’re on the trail? Are you bringing a solar charger?” I had initially planned on picking up a Goal Zero solar charging panel, but the Appalachian Trail and solar chargers don’t mix well. They call it the “green tunnel” for a reason, after all. In place of that I went with this external battery pack, which when fully charged will charge my iPhone 6 up to three times. Four full charges (once directly through an outlet, and three from my portable charger) should be more than enough to meet my needs from town to town while I’m on the trail. The phone is going to be essential, providing access to podcasts, books on tape, music, a camera, and this blog of course. I’ve been using this charger for about a month since I picked it up and it’s worked great so far, so if you’re looking for one I’d definitely recommend it.
 Dry Bags and Compression Bags – 5.2oz & 1.4oz: Only one pictured here, but I’ll be bringing both this 13 liter dry bag and the 16 liter compression bag, both made by Sea to Summit. There’s only so much space in a pack – 60 liters for mine – so making good use of the limited space you have available is crucial. The bag picture on the right will be used as my food bag, and my compression sack will be used for my sleeping bag. These also come in handy for hanging bear bags – no need for an additional bag to tie up to hang from a tree!
…and all that other good stuff
Most of the essential pieces of gear were covered above, but there’s a whole lot more that I either wasn’t able to get a picture of, or have not yet purchased. It’s mostly clothing, but:
- 250g heavyweight merino wool baselayer – Smartwool
- 150g micro-weight merino wool boxers – Smartwool
- Powerstretch hooded sweatshirt – EMS
- Merino wool quarter zip long sleeve shirt – EMS
- Tekwik synthetic t-shirt – EMS
- Nylon hiking pants with DWR waterproofing finish – EMS
- Baseball cap
- Sunglasses
- 2x bandana
- Gorilla Pod tripod with iPhone attachment
- Velcro strips (for mounting the Gorilla Pod onto my hiking pole)
- Baking soda or comparable low impact toothpaste
- Toothbrush
- Floss
- Vitamin I (Ibuprofen)
- Melatonin
- Moleskin (and lots of it)
- Duct Tape
- Ace bandage
- Bug Spray 100% deet (only for use in high tick population areas)
- Wallet with cash, identification, and debit card
- The AWOL Northbound Appalachian Trail Guide
- One collapsible rubber cup
- One collapsible rubber bowl
- A salt and pepper dispenser
- Two sided spork
- Glove liners
There’s bound to be more things that I’m forgetting, but this is the bulk of it. Point being – you have to fit a LOT of gear into a backpack in order to successfully hike the Appalachian Trail (not that this guarantees success – it’s a necessary condition, not a sufficient one). That doesn’t even include food either, but that’s for another time.
If you ever want to see the passage of time distorted, simply plan a thru-hike and try to get everything you need done with three weeks left. Everything changes when the clock starts ticking.

This website contains affiliate links, which means The Trek may receive a percentage of any product or service you purchase using the links in the articles or advertisements. The buyer pays the same price as they would otherwise, and your purchase helps to support The Trek's ongoing goal to serve you quality backpacking advice and information. Thanks for your support!
To learn more, please visit the About This Site page.